Showing posts with label tutorial. Show all posts

Thursday, February 5, 2015

Picking Out An Outfit

Here's a quick video I took one day describing how I pick out my outfits.


In summary, I pick one item that I really want to wear and then build everything based upon that item. After I've chosen my item, I will also take the weather & what I'm doing (going to work, going to dinner with friends, going over to someone's house, etc.). Do I need to layer? Is it going to be hot at different times? Do I need to be formal or casual? After that I build the outfit from there adding a top/cardigan, accessories, and shoes based on the answers to those questions.

Are there any specific videos you'd like to see? What do you need some advice on? 

Saturday, June 14, 2014

where we've been & where we want to go map tutorial


here's whatcha need: 
1. a map
2. cork board at least the size of your map
3. spray adhesive
4. scissors {{i ended up using an exact knife instead}}
5. a pen to trace the map so you can cut out the cork board if needed
*most items can be found at Michael's craft store or AC Moore, maybe even Walmart*
*we purchased the map at the NYC library, but i know there are some online from Target for a pretty good deal.*

and here's how ya do it:

1. unroll the cork. flip it to where the edges are down. {{**tip: roll the cork out and put something heavy on top a day or so in advance so when you glue the map the edges don't roll back up & un-stick the map. i didn't do this & my edges rolled up, which you can see a little bit in the pics below.**}}
2. lay the map out & line it up with the edges.
3. trace the outline of the map onto the cork.
4. cut out the outline of the cork with an exacto knife.
5. spray the glue adhesive on the cork per the directions on the can. then smooth it down. i have loved this spray adhesive! it did not bubble up at all!!
6. trim the excess cork with an exacto knife.
7. since i didn't unroll the cork & flatten first, the edges started to roll up quickly. so while Hao & i were putting our pins in all the places, we put heavy stuff on the edges to straighten them out and help hold he adhesive to the paper.  {{we color coded our pins- green: where we've been, blue: where we are booked to go, & white: where we want to go}}


final look.


 where we've put the map until we get it into a frame.

{{linking up with these guys}}

Friday, May 9, 2014

How I Pretty-Up

Here are the products I use daily, or almost daily, and my opinions about them!

>Ocean Potion Aloe Lotion: I use this product in the spring/summer. Not only does it help your tan last longer, it also smells amazing!!

>Olay: This is what I use mainly in the winter or when I need some extra moistur for my skin. I also love the shimmer- it's just enough to be noticeable without being too much.

>It's a 10: This product is AWESOME! It does a great job adding volume as well as making your hair softer. It also smells fantastic!! I'm pretty sure you can only get this product at salons.

>Frizz Ease Extra Strength: I have used this product for years- and will continue to use it. I also use the Frizz Ease shampoo & conditioner. It really calms my hair and helps it stay straightened.

>Frizz Ease 3 Day Straight {trial size}: I got this in my last Influenster Vox Box. It is comparable to the Frizz Ease Extra Strength. This product also calmed my hair down. That day, I didn't even have to straighten my hair.

{You can find more information about both of these products here.}


>Garnier Refreshing Cleansing Towelettes: These are my favorite towelettes. In comparison with Neutrogena, these leave my face feeling much softer and cleaner. They do exactly what the title says- removes my make-up & leaves my face feeling fresh.

>Clinique Even Better Eyes: Under-eye circles run in my family, so it's an issue that I will be dealing with for the rest of my life. This product not only covers really well, it also reduces the actual darkness of the under eye circle! I've used other brands, and this is my favorite!

>Clinique Dramatically Different Lotion: This lotion has done wonders for my skin, especially over the winter. It gives my skin lots of moisture without being greasy or gross feeling under my make-up.


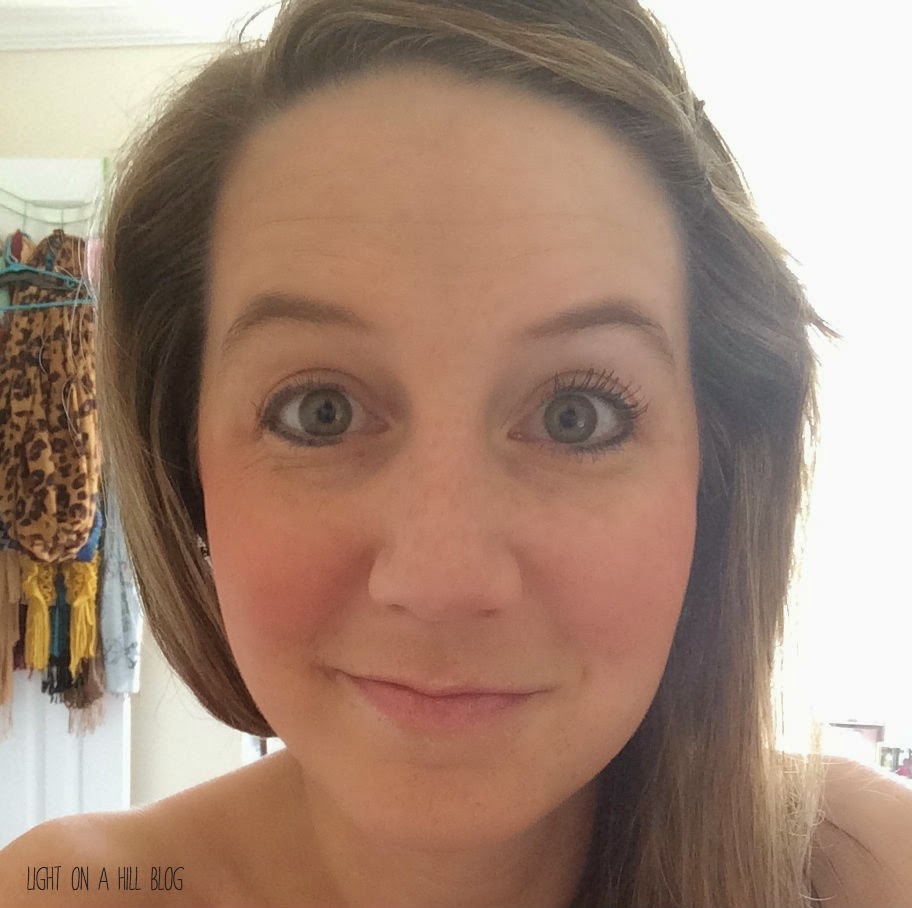
1. Covergirl Bombshell Mascara in Blackest Black: I have tried mascara after mascara & this is my favorite. Other mascara I've used either smear, flake off, or are super difficult to remove. This is just a perfect mascara- even at the bottom of the tube. I lasts all day & comes off easily with make-up remover. And, as you can see in the pictures below, does a great job at lengthening & volumizing your lashes with out being too much.

2. Revlon ColorStay Under-eye Concealer: Since I'm paranoid about my under-eye circles showing, I double up on the under-eye concealer. This stuff just adds a finishing touch & smooths everything out... and keeps my mind at ease, lol. We all have that one part of our body {or two... or three...} that we worry about ;)

3. Garnier Skin Renew BB Cream in Light/Medium: I love, love, love this stuff! It has the perfect amount of coverage with out being too thick. It can make your skin a little oily, so if you have oily skin, there is a different version you can use.

4. Revlon ColorStay Powder in Light Medium: This powder covers well & lasts a long time. I don't have to re-apply it, even when I do something after work. I like how it covers my skin, but doesn't leave it with a chalky feeling.

5. L'oreal True Match Blush in Soft Sable: You can see what it looks like on me in the picture below. The blush is rather potent, but it in a good way. You don't have to use a lot to get color on your cheeks, which means it lasts a while. Just be careful with over doing it!

6. L'oreal Infallable Eyeliner in Black: The name is pretty much true- it does last a long time and doesn't smear. It will run if your eyes water or you cry, but not as bad as others I've used. I have re-purchased this multiple times because I love it so much!

7. Revlon Lash Curler: I just started using a last curler about a year ago {and I used one in the pics below}. It has made a big difference in making my lashes noticeable.

{ColorStay products found here.} & {Loreal products found here.}

What a difference mascara makes! The bombshell mascara is one of my favorites & I highly recommend it!!

Thie finished product!

Do you have any products that you just adore?

Follow on Bloglovin

Sunday, April 6, 2014

Organizing Cards!

this is really a pretty simple craft/organization project for your wedding, baby shower, or Christmas cards! it took me about 30 minutes, and that was because i had soooo many cards and mementos! 

here's whatcha need:
1. cards/notes
2. hole puncher {you can purchase a similar one here, though i recommend getting one for 20 papers instead of 10}

3. binder. i can be a larger one or a smaller one, depending on the size and number of your cards. we had a lot of cards, so i knew i'd need a bigger one. 

steps:
1. organize your cards/mementos into piles. i put my wedding mementos like invitations and what not in the front.

then i organized the cards into what shower they were from or if they were from work people or family or mutual friends. {i sometimes overly organize, lol}

2. punch the holes and put them in the binder! to separate where they came from, i would punch some holes on the top 2 and then the next category i would punch the bottom two holes. you can see that in the pic below:


and, well, that's it!! 

a bottom view of the finished product! they barely fit into the binder!


since the binder wasn't that cute, i will be doing another post on decorating the binder soon!! 

Have any of you done something with their wedding materials? I'd love to hear your ideas!! 

Tuesday, March 25, 2014

5 minute "sock" bun tutorial

here's my take on the "sock" bun:

whatcha need:


1. since this is done on 2nd day hair, sometimes i will use dry shampoo to bring back the bounce in my hair. i highly recommend this product! it really works! 


2. hair spray for hold and those pesky flyways.

3. a gripper headband
4. a hair twistie {not pictured}
3. a sick bun roller to match your hair color {pictured in step 3} 


6. a teaser brush to smooth the bun
{on a side note, notice the show playing ion my ipad? yeah, i love to watch netfilx when i get ready.}

the steps: 
step 1. spray dry shampoo and put gripper headland in hair. push back a lil ways.

step 2. pull hair back and loosen a little between headband and pony, then between headband and hairline to give a little lift and so your hair isn't super flat to your head.

step 3. grab your sock bun roller and put your fingers in the middle.

step 4. grab ponytail at base, near the hair tie.


step 5. pull hair through. leave a tiny bit of space between sock bun roller and hair tie.


see the small space?

step 6. split your hair in two or three chunks.


step 7. grab a chunk of hair and tuck it under the sock bun roller.
then repeat step 7 until all chunks are tucked in.


here's what the first tuck looks like


step 8. after all the chunks are tucked in, push the sock bun roller down to the hair tie and smooth/spread the bun with this teaser brush and spray with hairspray. 
*if ya have some flyways, brush them down with the teaser brush and spray as well.*


the final look! 

the first time you try this, it may take more than five minutes. but after you've done it a coupla times, it will seriously only take you five minutes!! i love doing this on the days where the weather is crazy or when i like to sleep in :) 


Follow on Bloglovin

Monday, March 17, 2014

curling hair with a straightener

happy st patty's day!
today i am linking up with molly and carly for funday monday! click on the pic below to link your blog or to check out other funday monday blogs!

still being [molly]

okay, so this is my first tutorial, so bear with me :)
this is the easiest way i've seen to curl your hair with a straightener. it's a loose and relaxed curl.

final product {excuse the cow-licked bangs, they are freshly cut}


my hair before. just after being blow dried.


don't forget to go ahead and turn your straightener on!! mine

step 1. twist the top half of your hair back into a bun or something along those lines. you want to make sure the top half of your hair is all the way up so you don't accidentally grab it with the straightener when you're working on the bottom half of your hair. {i speak of this from experience. it hurts!!}

so, normally you hold your straightener like this.
 
2. to achieve the lightly curled look, you want to hold your straightener the opposite. 
twist your hand, with your straightener in it, to the right if you're a lefty and to the left if you're a righty. {you should see me as i sit at my computer to typing this out. it's quite a sight.}

this is what happens when the photo timer goes off and you know you're not ready, lol.

3. then grab your hair and pull slowly tightly down. as you move down, hold the straightener tight on the hair, like squeeze it, and move slow {that's what gives it the curl} tip: you'll want to hold the bottom part of your hair to give you some resistance. you might want to hold the hair tighter than i am in this picture to help with the resistance and creating curl.

4. as soon as you're done, twist it tightly with your fingers.

5. repeats steps 2-4 over and over again until you're done with the bottom. it took me about 5 or 6 different times. make sure you spray it with hairspray! i use john frieda hair spray


my first curl. don'tcha love the facial expressions?  

the bottom half done. not many layers here, so the curl is a little less obvious.

6. after you've sprayed the bottom half, move onto the top half, repeating steps 2-4 until you've done your whole head and let it cool. then spray it with hair spray... like lots! well, i tend to get a lil carried away with the hair spray, lol.
afterwards it's all done.

7. after your hair has cooled, run your fingers through your hair to separate the curls. 


8. then finger style and spray with the some hair spray {last time, i promise!!}

one more selfie with the finished look.

random side note: this shirt is super special to me. hao proposed in central park, nyc almost a year ago and when i found this at old navy this fall, i just about died from excitement! also, it's wrinkly cause i don't iron. haha.

Follow on Bloglovin